What we covered?
Do you want to know: How To Verify Facebook Page? Then Keep On Reading:
Introduction:
Want to verify a Facebook page? In this blog, we discuss terms & conditions, if you check those T&Cs and the steps you must follow to get Verified blue tick on your Facebook page/profile.
What are the Conditions for Verified Facebook Page?
In case you own a Facebook page that is categorized under local business, company, or organization, then the page is eligible for a gray verification badge. You must have likely seen this before. Did you ever notice small blue checkmarks that are next to celebrities’ profile photos on various social media networks such as Facebook, Instagram, or Twitter? It means you have seen a verification badge.

What is a Verification Badge?
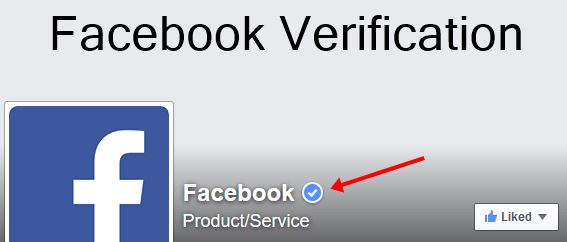
Verification badges let all your page visitors know that the page is authentic. Blue verification badges are known for public figures, celebrities, brands, and the gray verification badges are for businesses and companies.
In case you want to verify your page, you can do it from your page’s settings. However, only the pages with a profile and cover photo are eligible. Facebook pages can only be categorized under local businesses, companies, and organizations. But if you don’t have a profile or cover photo, then you can forget about it. You will not be eligible for the badge.
What is the Difference Between Blue & Gray Ticks?
Two different colors of checkmarks appear next to Pages and a few profiles on Facebook. Blue checkmark usually indicates the confirmed authenticity of Pages, public figures, and brands. This shows that it is the official account for a brand, business, or person. Pages and personal profiles both can get this type of verification.
Gray checkmarks, on the other hand, indicates a confirmed location for any specific business. This one isn’t quite difficult to obtain or noticeable, but it can still help your business gain some credibility on Facebook, which is a very good thing.
Before moving onto “How To Verify Facebook Page? Quick & Easy 2 Ways!”, make sure that:
- The page is in the top form.
- Facebook usually doesn’t have a strict list of particular requirements.
- Your page looks great and credible also which will go a long way when Facebook is reviewing your verification request.
In order to “How To Verify Facebook Page”, also make sure that your Page has the following:
- A Website.
- Your contact information.
- “About” page and long-form description.
- A good chunk of content.
It is very important to note that certain types of Pages can become verified which includes Public Figures, Companies, and Organizations.
In order to start verifying your Facebook Page, start right at the actual Page and go to your Facebook Page’s settings, then go to “General.” You’ll then see the option for the “Page Verification” only if you have the ability to get your Page verified.
Then you will have the option for “instant” verification, for a more lengthy verification process. Former one gives you the option to have a Facebook call your Page’s publicly listed phone number. You’ll be given a verification code, which you will then enter into the box Facebook provides you with. Facebook will then award you a gray checkmark and then eventually, potentially a blue one.
Businesses may belong to any big chain, franchise, or corporation. The main account may often be run by the corporate’s marketing team which will be the one with the blue checkmark. And, also all individual local locations may earn the gray checkmark.
How To Verify Facebook Page? 2 Quick & Easy Ways
You may verify your page in two ways:
- Either With a phone number.
or - With a document.
1. How To Verify Facebook Page With a Phone Number?
- Go to your Page Settings:
Go to your page then go to Settings located on the right side of your screen, above your cover photo.
In case you have a Business Manager account, you will have to go to the Business Manager to access Settings.
In the Settings tab from Business Manager is also located on the right side of your screen, above your cover photo.
- Go to Page Verification:
From the “General” go to “Page Verification” and click “Edit.”
- Verify the Page
Now Click “Verify this Page. - Provide Business Phone Number
Now enter the publicly listed phone number for business or organization you have to click “Call Me Now.” Facebook, it will call the number you provided also give you your verification code.
- Enter Code to Verify
You will have to then enter the code to verify your Facebook page.
2.How To Verify Facebook Page With a Document:
- Verifying with a Document
You may also Verify your page with a document by clicking “Verify this Page with documents instead.”
- Upload Document
You may also upload a business utility or phone bill, business license, business tax file, any certificate of formation, or any articles of incorporation. The information you will share will not be shared with the public.
- Wait
You will then receive a confirmation stating that the documents you provided are being reviewed. Then, You will hear from Facebook via email within a few days.
Conclusion
After reading this blog, we are sure that you have an answer to the question with which we started: “How to verify Facebook page”. Do share your experience and reviews in the comment section and do not forget to follow us on Facebook: Techysea.

Thank you for reading “How to verify Facebook page”!

