How to block Emails (or someone) on Gmail: Gmail is the people favorite Email service and people are using it from it for almost last 9 years, when it was launched in beta. Now, Gmail is full of features, but there are many things which are not as simple as it should be for readers. If you ever tried to block an Email address in Gmail, you would know what I meant here. There is no one-click button to block any Email address, and all you can find is Spam Email.

What we covered?
How to block emails from Gmail:
Any Gmail User can Messages from a Sender Email Address using one Method and it is the only way to stop receiving the messages from the Gmail Senders on the web. We have Explained it clearly in the Below section and also we have added an Tricky way to avoid Getting mails from other Gmail user for ever
1) How to block an email address in Gmail:
Gmail has added a direct option on the emails to stop the Sender from the throwing the Spam mails to you. And you can halt the Process to be happened by following below Method:
- Open any Web Browser and logon on to Gmail
- Sign in with your Gmail Address & Password , navigate to the dashboard of Gmail.com
- On the Search box, type in the Sender’s Email Address and Click on Enter
- Now you could all the Emails listed in one single row along with the Sender Profile details
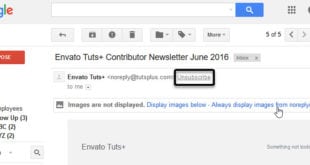
- Here Click on ‘Drop-Down icon on Right Corner of the Gmail user to see the Menu options
- From the options click on ‘Block”Sender Name” ‘, and confirm the Block feature
Unblock the Sender’s Mail:
It is a Simple Process and you can easily learn it, all it takes is few seconds, So let’s Begin
Method-1:
- Go to Gmail Dashboard, Search for the Senders Email and Click on ‘Enter’ option
- Once you get to see the Sender’s Profile Click on it
- There you see a Direct option ‘Unblock Sender’ tap on it
- done, you have unblocked the Sender and Emails will flow in.
Method-2:
- Open Gmail website and navigate to Gear icon ( Right of the Search bar)
- Click on Drop-Down icon for menu options, Select the ‘Settings’ button
- Now a New Window will open in the Gmail Dashboard itself
- In the Settings Page, navigate to ‘Filters & Blocklist’ Page, then you see the Complete block list
- From the Block List, Click on ‘Unblock’ right beside the Sender’s Email
2) How to divert Emails to Trash Folder
- On the Gmail Website, Go to Search bar on the Main Dashboard
- Click on ‘Drop Down’ icon in the Search Box, Here a wide range of Options will be displayed
- Type Sender’s Email Address in the ‘From :’ Box and Click on ‘Create Filter’ Button
- In the Next Page, Click on ‘Delete It’ option , then instantly you get a Pop-up saying the Mails from particular Sender’s Gmail address will be moved to Trash
3) Add Sender Email Address to Block List
a) Add one More Email Address in the Filter Created above in the Second section (2) by just adding From: option & add email address to it
b) Go to Gmail Dashboard, Click on ‘Gear’ icon open Drop-down menu-> Click on ‘Settings’. Open Block List and add a new email address to the Block List
Now all the Three Methods explained here in this Guide will definitely help you in solving Block List issue on your Gmail application. And once you perform this Tasks, you no longer get mails or Messages from that Particular Sender’s Email address for ever. So your Problem will be solved permanently.


